Arrow 2 Prompt Guide
Write clearer Arrow 2 prompts for vector artwork, references, sketches, vectorization, and micro animations.
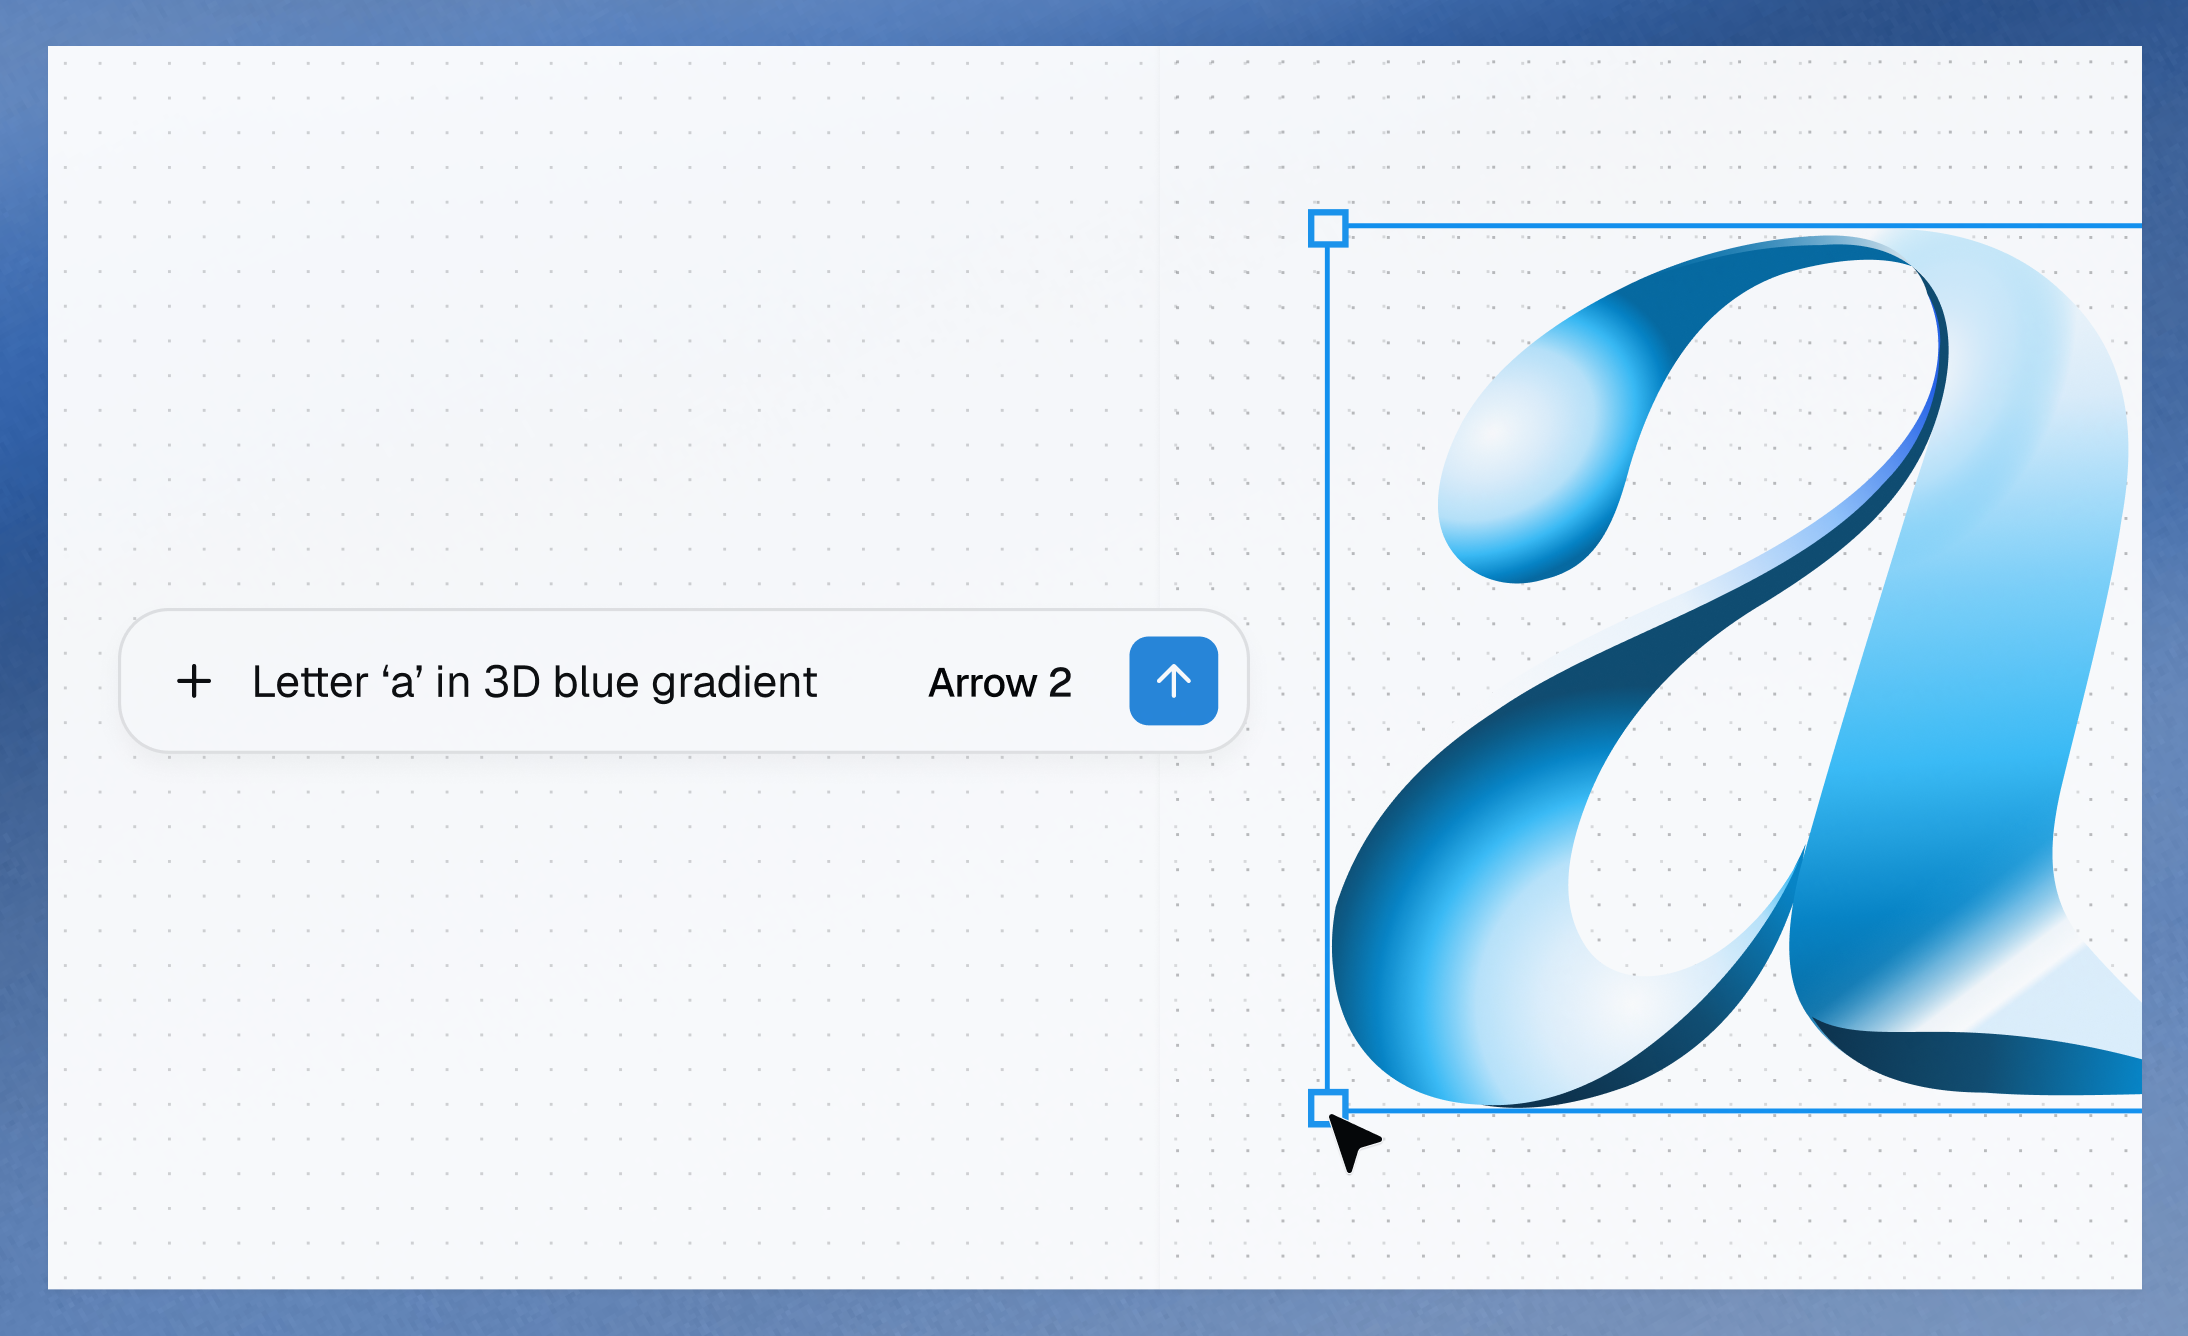
Turn a design goal into an editable SVG. Define the intended use, visual direction, and constraints, then refine one decision at a time.
Start in Create, or review the App overview. For service-to-service use, follow the API quickstart.
Write a clear vector prompt
Start with this template and replace the brackets with your requirements:
Create [subject] for [use and size].
Use [style], [colors], and [composition].
Include [required details].
Avoid [unwanted details].
Cover the details that change the result:
- Purpose: asset type, use, and final size.
- Style: flat icon, editorial illustration, technical line art, or another clear direction.
- Composition: viewpoint, crop, placement, scale, and spacing.
- Construction: palette, fills, stroke weight, geometry, and background.
- Text: exact wording, capitalization, and placement.
- Constraints: required, excluded, and unchanged elements.
Instead of “Make a coffee icon,” specify its context and construction:
Create a 24 × 24px SVG icon of a ceramic coffee cup for a mobile toolbar.
Use a 0 0 24 24 view box, a front three-quarter view, rounded geometric shapes,
a two-color navy and cream palette, and a consistent 2-unit outline.
Center it on a transparent background. Do not include text, a saucer, or shadows.
Size and viewpoint set the composition. Palette, shapes, and stroke weight define its construction. Include a constraint when it rules out a plausible but unwanted result.
Use a reference image
Use a reference to direct style or composition. Name what to preserve and what may change.
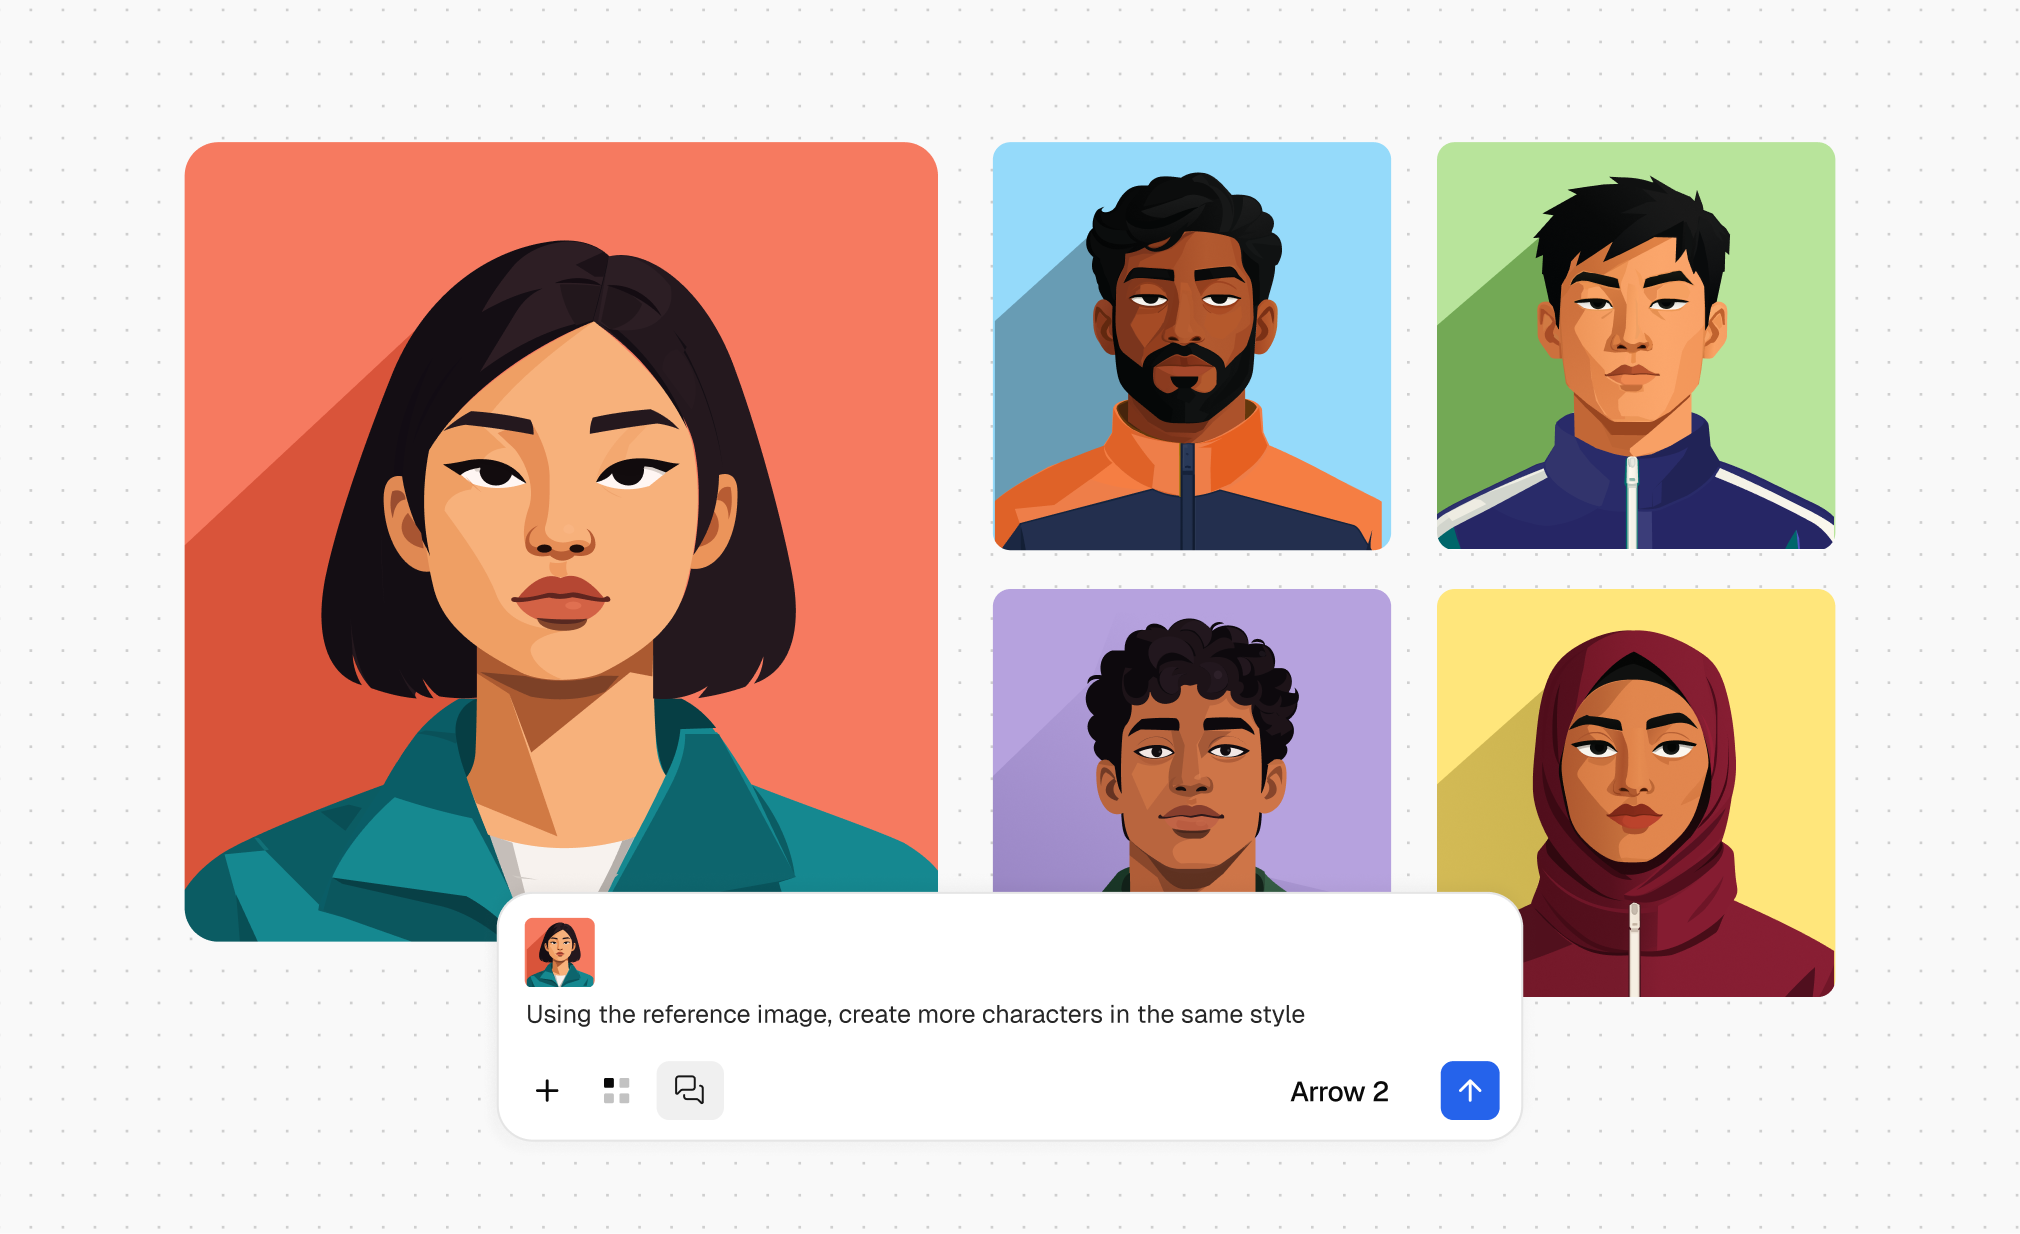
Prompt shown:
Using the reference image, create more characters in the same style
For more control, separate what to preserve from what to change:
Use the reference image for its close portrait framing, bold shape language,
flat graphic shading, and high-contrast palette. Create a new character with
different hair, clothing, and background colors. Keep the head scale, crop,
and shading treatment consistent.
With multiple references, assign one role to each—for example, silhouette from the first and palette from the second. To convert the source itself, use vectorization.
Structure your prompt with JSON
For a detailed or reusable prompt, JSON can separate style, composition, palette, subject, and output requirements. Choose keys that fit the task; they are not an Arrow-defined schema.
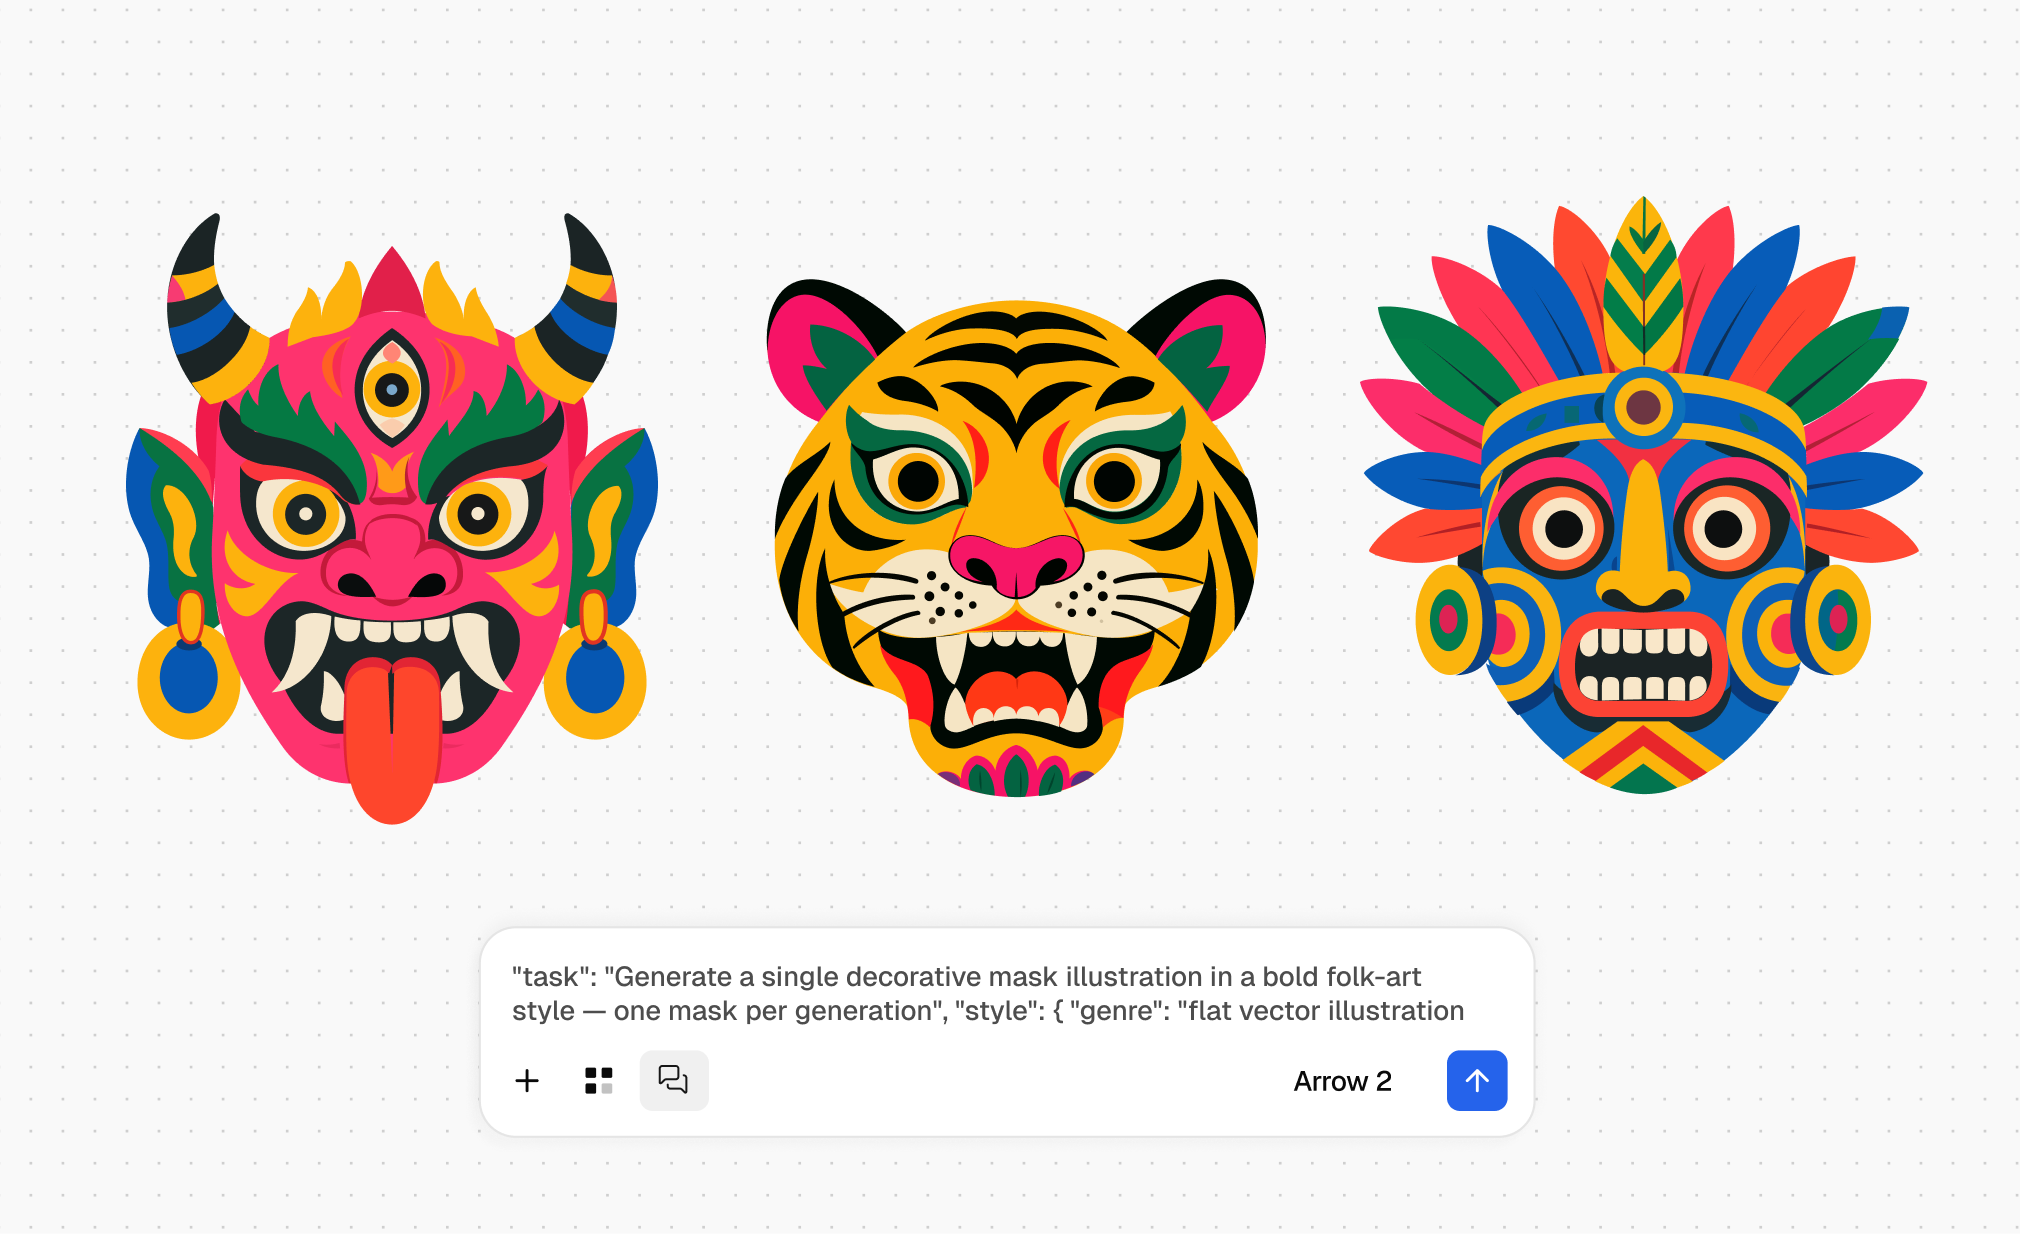
Three decorative mask results beside a partial structured prompt.
View the complete JSON prompt
{
  "task": "Generate a single decorative mask illustration in a bold flat folk-art style — one mask per generation",
  "style": {
    "genre": "contemporary folk art, flat vector illustration, stylized ritual/ceremonial mask design",
    "influences": [
      "Newari, Tibetan, and Balinese ritual masks",
      "Mexican lucha and Day-of-the-Dead mask iconography",
      "modern editorial and children's-book character illustration",
      "mid-century screen-print poster art"
    ],
    "line_work": "clean flat vector shapes, minimal to no outlines — color blocks sit directly against each other; thin linear detail allowed only for texture (fur strokes, spots, wrinkles, patterns, face-paint lines)",
    "shading": "strictly flat color, no gradients, no drop shadows, no 3D rendering — depth implied only by layered flat shapes",
    "symmetry": "bilateral symmetry around a vertical center axis by default; occasionally break it deliberately with a two-tone split face or asymmetric ornament for variety"
  },
  "color_palette": {
    "approach": "highly saturated, maximalist, joyfully clashing combinations, 3-5 colors per mask",
    "background": "flat warm off-white / cream (#F2EEDD range), no texture, no vignette",
    "color_pool": [
      "hot pink / magenta",
      "cobalt or royal blue",
      "marigold yellow / mustard",
      "coral red / vermillion",
      "kelly green",
      "black as a bold color block",
      "burnt orange",
      "teal",
      "lavender"
    ],
    "rule": "contrast the base face color strongly against feature colors (eyes, mouth, ears, headdress) rather than using tonal/shaded variants of the same hue"
  },
  "composition": {
    "canvas": "square or portrait, mask centered with generous cream padding",
    "framing": "face/head only, cropped at neck or chin — no shoulders, body, or hands",
    "orientation": "front-facing, direct eye contact with the viewer"
  },
  "subject_matter": {
    "categories": [
      "wrathful demon or guardian deity (horns, fangs, third eye, protruding tongue, flame motifs)",
      "animal mask (tiger, leopard, wolf/jackal, monkey, bull, owl, boar) with expressive human-like eyes",
      "human ceremonial face with face paint, tattoos, or patterned skin markings",
      "royal or divine figure with an elaborate crown, headdress, or beaded halo",
      "abstract patterned 'face' (concentric circles, polka dots, chevrons, spirals) mapped onto a face silhouette",
      "hybrid creature (part animal, part human, part mythic — e.g. bird-beaked deity, fanged monkey-king)"
    ],
    "must_include_at_least_two": [
      "large expressive almond or circular eyes with a visible pupil, outlined in a contrasting color",
      "one striking facial ornament: horns, crown, oversized earrings, headdress feathers/spikes, tusks, or a face-paint pattern",
      "a distinct mouth treatment: fangs, a lolling tongue, a bold mustache, painted lips, or bared teeth"
    ],
    "optional_accents": [
      "dangling earrings, tassels, or beaded jewelry",
      "a third eye on the forehead",
      "facial hair as a bold flat graphic shape",
      "symmetrical cheek markings (dots, swirls, stripes, rainbows)",
      "small jewelry details: bindis, studs, hoops, nose rings"
    ]
  },
  "mood": "playful yet powerful — mythic, slightly uncanny, equal parts cute and fierce; every mask should feel like it belongs to its own character or story",
  "technical_output": {
    "format": "flat 2D vector-style illustration, clean crisp edges",
    "scalability": "SVG shapes that remain clear at the intended print, sticker, or icon size",
    "avoid": [
      "photorealism",
      "3D shading, gradients, or embossing",
      "muted/desaturated palettes",
      "busy backgrounds or scenery",
      "text or typography",
      "visible body/torso — head only"
    ]
  },
  "generation_instructions": "Produce exactly ONE mask per generation call. Use the subject category, 3-5 colors from the pool, ornament type, mouth treatment, and optional accents specified for this generation. Keep the flat-color technique, symmetry approach, and cream background consistent so the set reads as one cohesive collection."
}
For a set, reuse the structure and change the subject, colors, or details deliberately. Record each combination because independent requests do not carry that history.
JSON organizes the prompt; it is not a separate generation mode. For the SVG generation endpoint,
pass it as text in the string prompt field. For the Responses API, include it as text in input.
Create a family of icons
Build an icon family from one reusable prompt. Define its size, geometry, spacing, and fill or stroke treatment, then change only the subject.
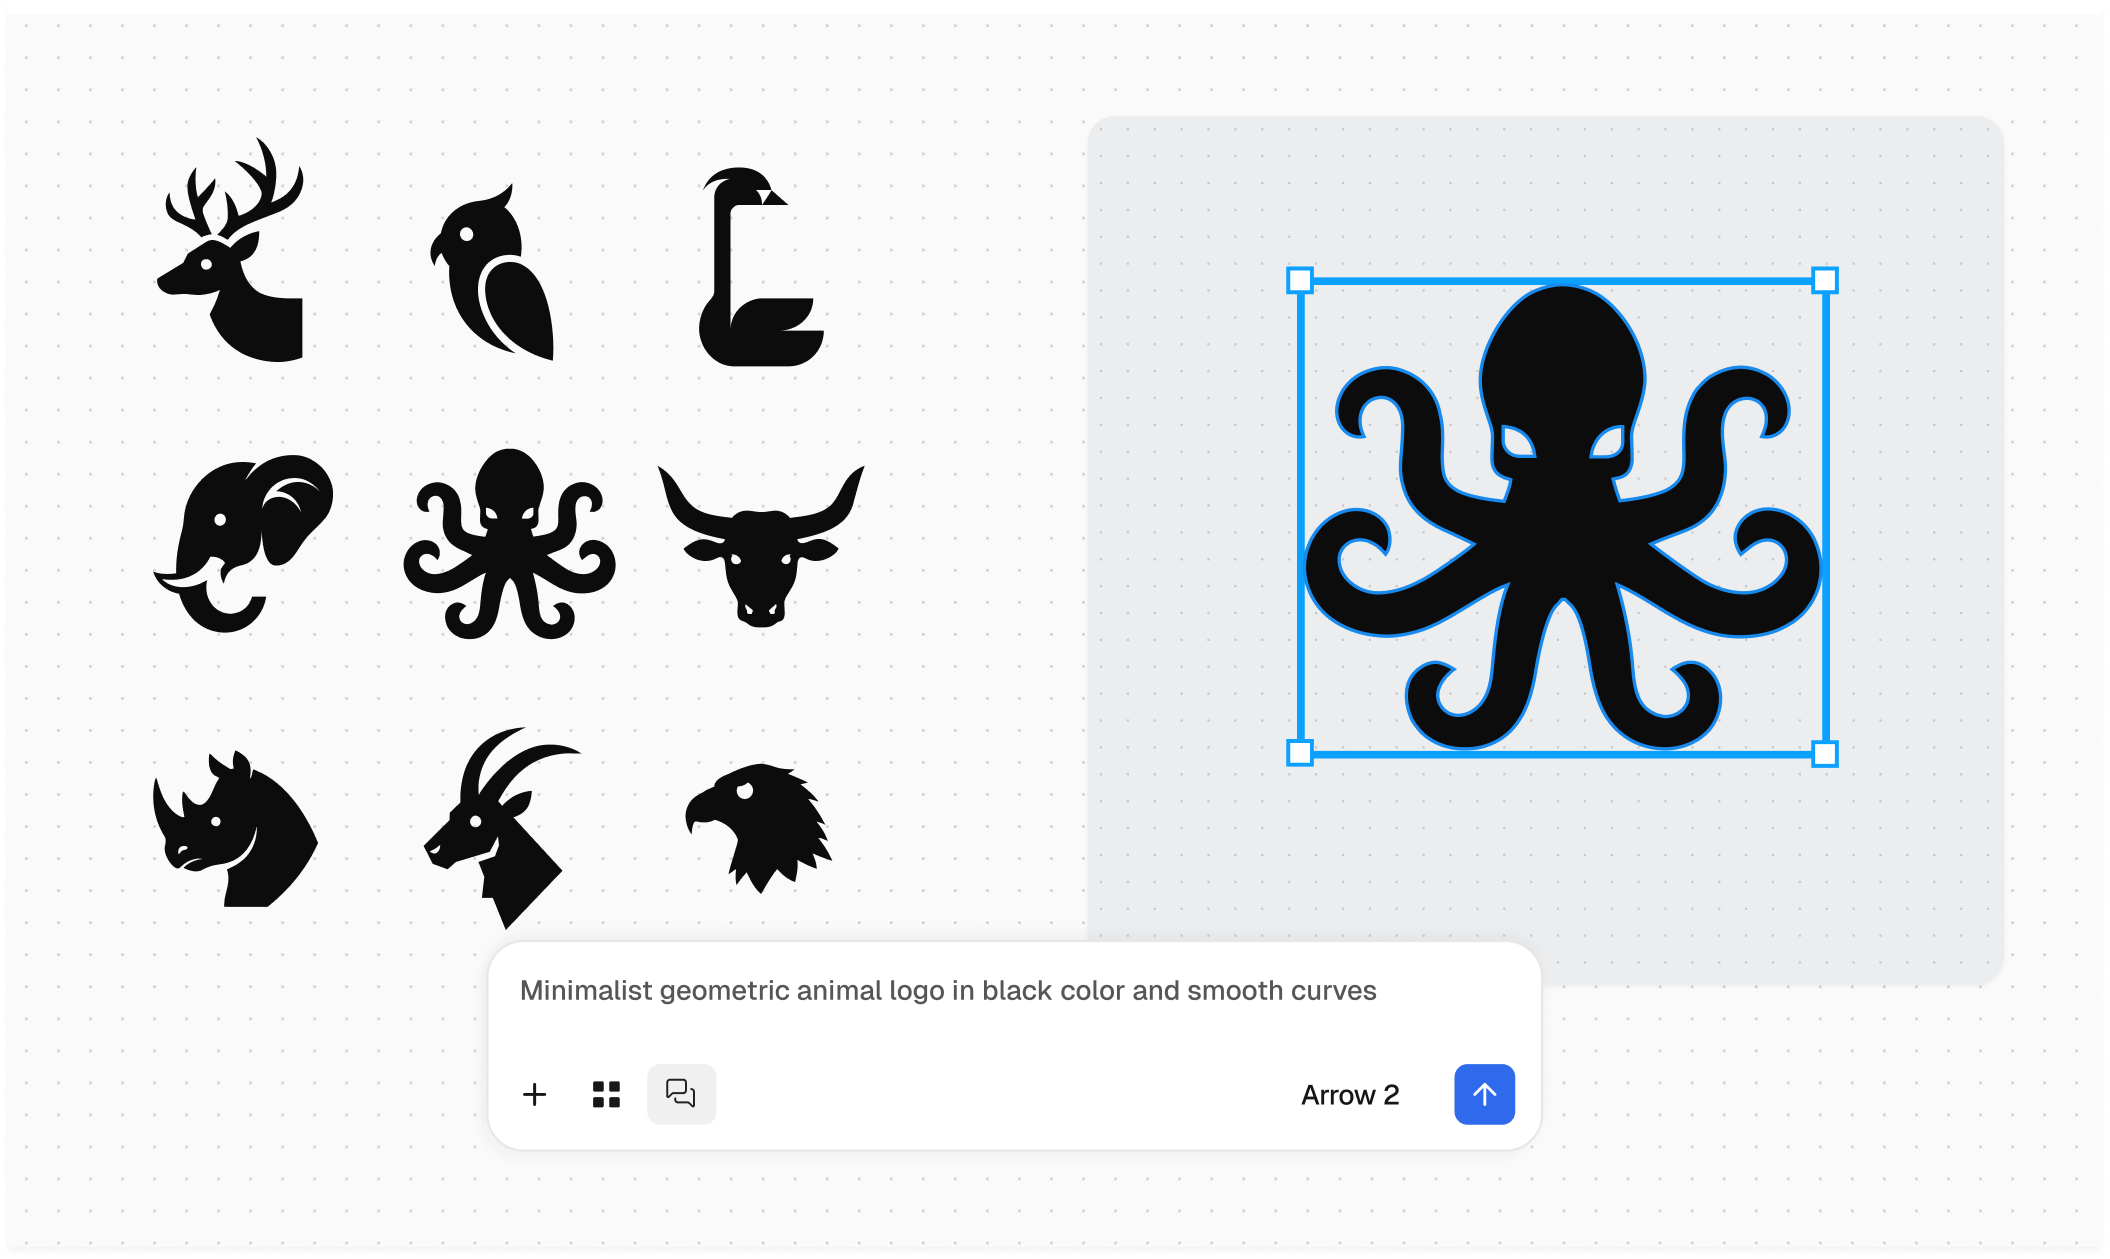
Prompt shown:
Minimalist geometric animal logo in black color and smooth curves
A more specific prompt to try is:
Create a 24px [animal] icon as a solid black geometric silhouette. Use smooth
rounded curves, consistent visual weight, and a square view box. Keep small gaps
and interior negative space readable at 24px. Use filled shapes only, with no
outlines, gradients, text, or background.
Replace [animal] for each icon. Compare the set at 24px and adjust only silhouettes that lose
their identity.
Experiment with models and effort
Compare settings with the same prompt, reference images, and output size.
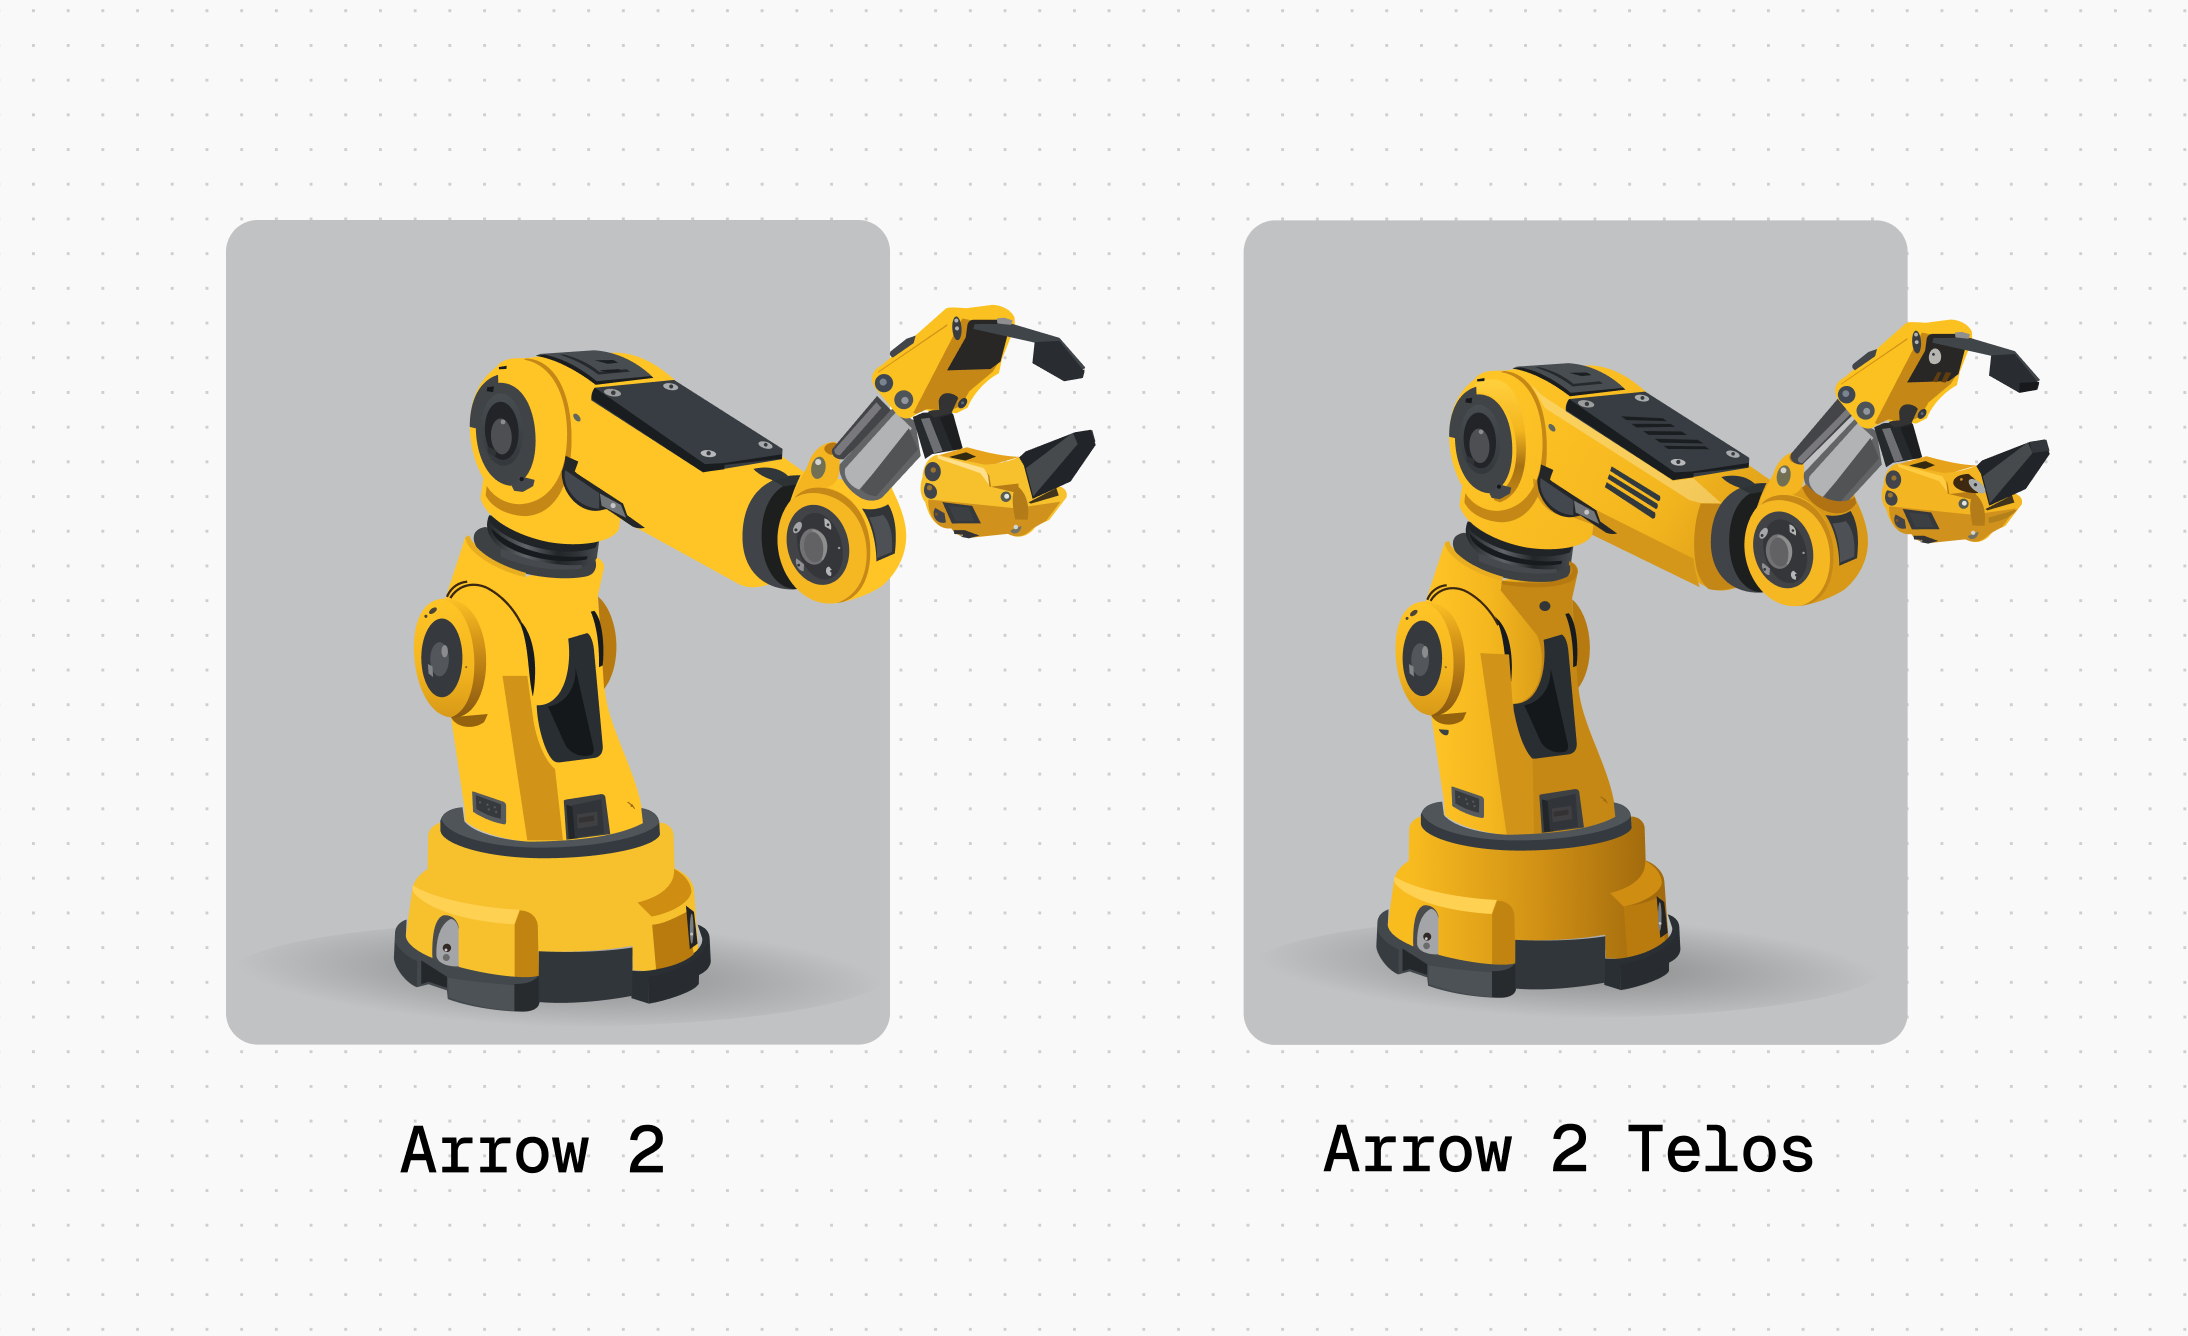
Arrow 2 on the left and Arrow 2 Telos on the right. In this example, the left result uses larger, flatter surfaces; the right adds vent details and tonal shading.
Hold effort fixed while comparing models. Then choose a model and adjust effort separately. Judge the silhouette, geometry, prompt adherence, and legibility at the final size. Extra detail or effort is not necessary for every task, especially a small icon or mark.
Create technical illustrations
For line work, name the viewpoint, construction details, line hierarchy, and any highlight color.
Fashion concepts
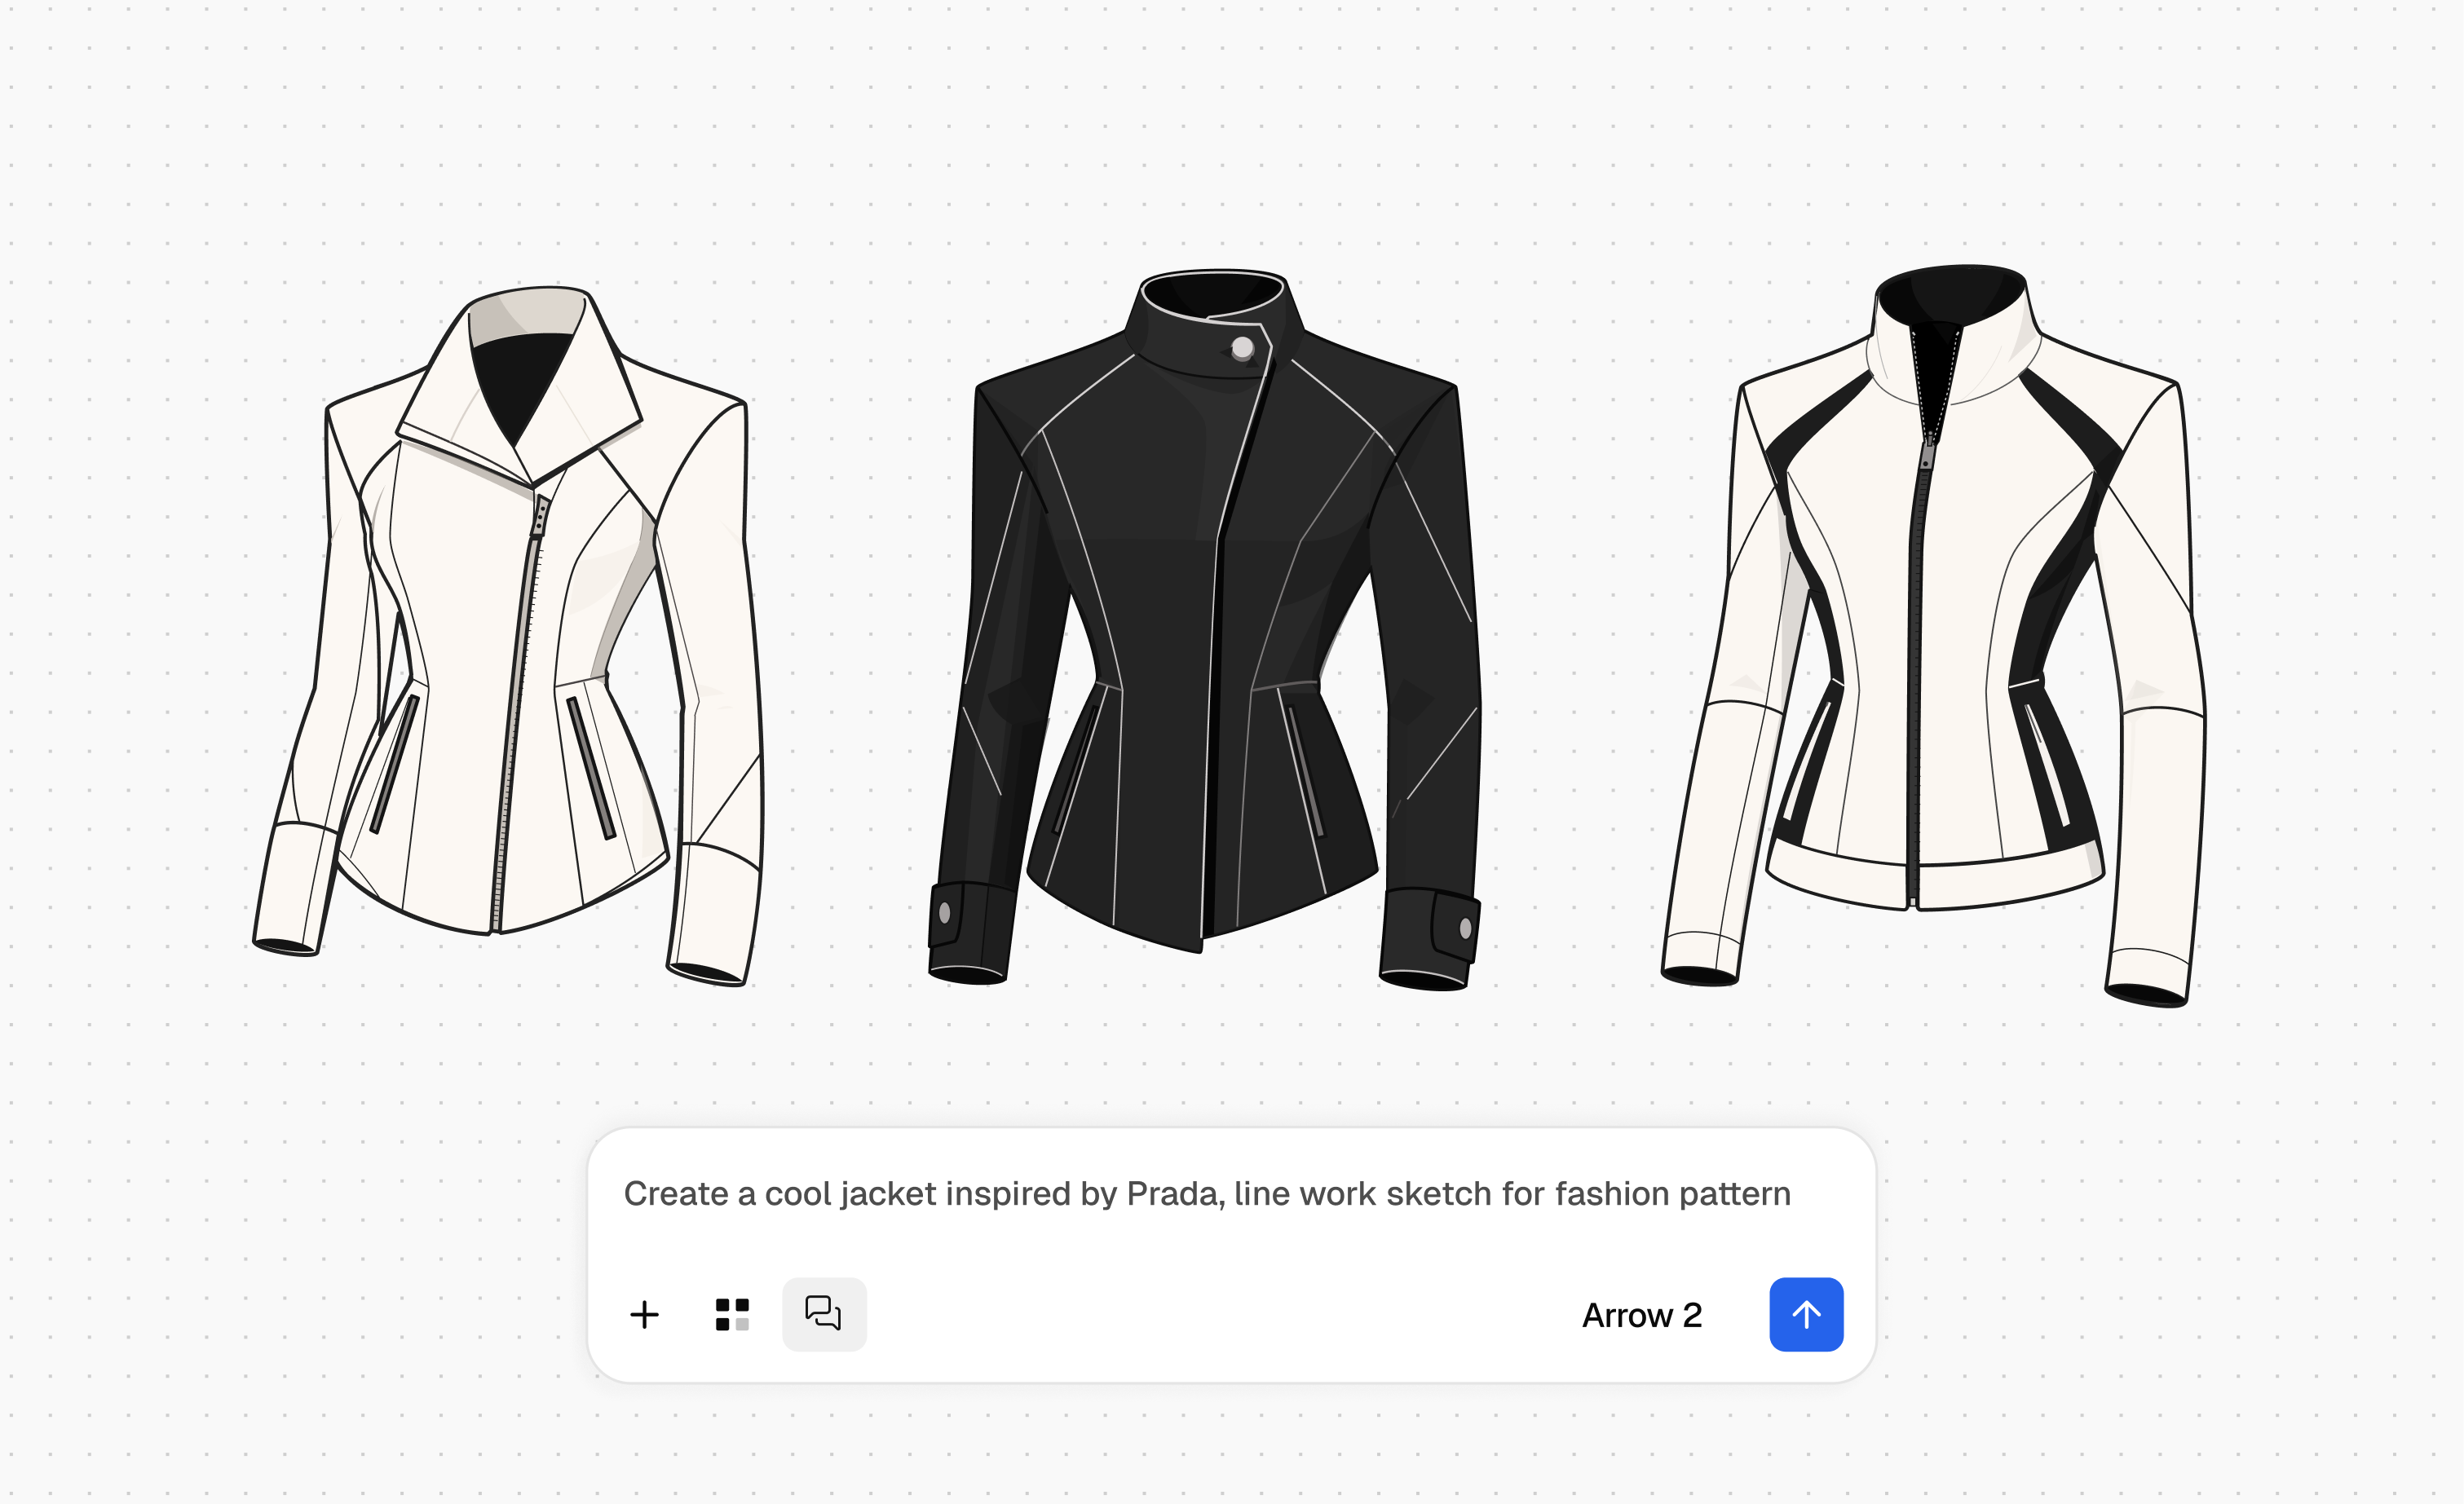
Prompt shown:
Create a cool jacket inspired by Prada, line work sketch for fashion pattern
A more specific prompt to try is:
Create one tailored jacket concept as a clean fashion line drawing. Show a
front three-quarter view with a cropped silhouette, contrasting shoulder panels,
a structured collar, visible seam placement, and an asymmetric zip closure.
Use black lines with one muted accent fill on a white background. Keep major
outlines heavier than construction details and omit the figure.
Check that seams, closures, and panels connect as intended before using a concept as a pattern.
Technical line art
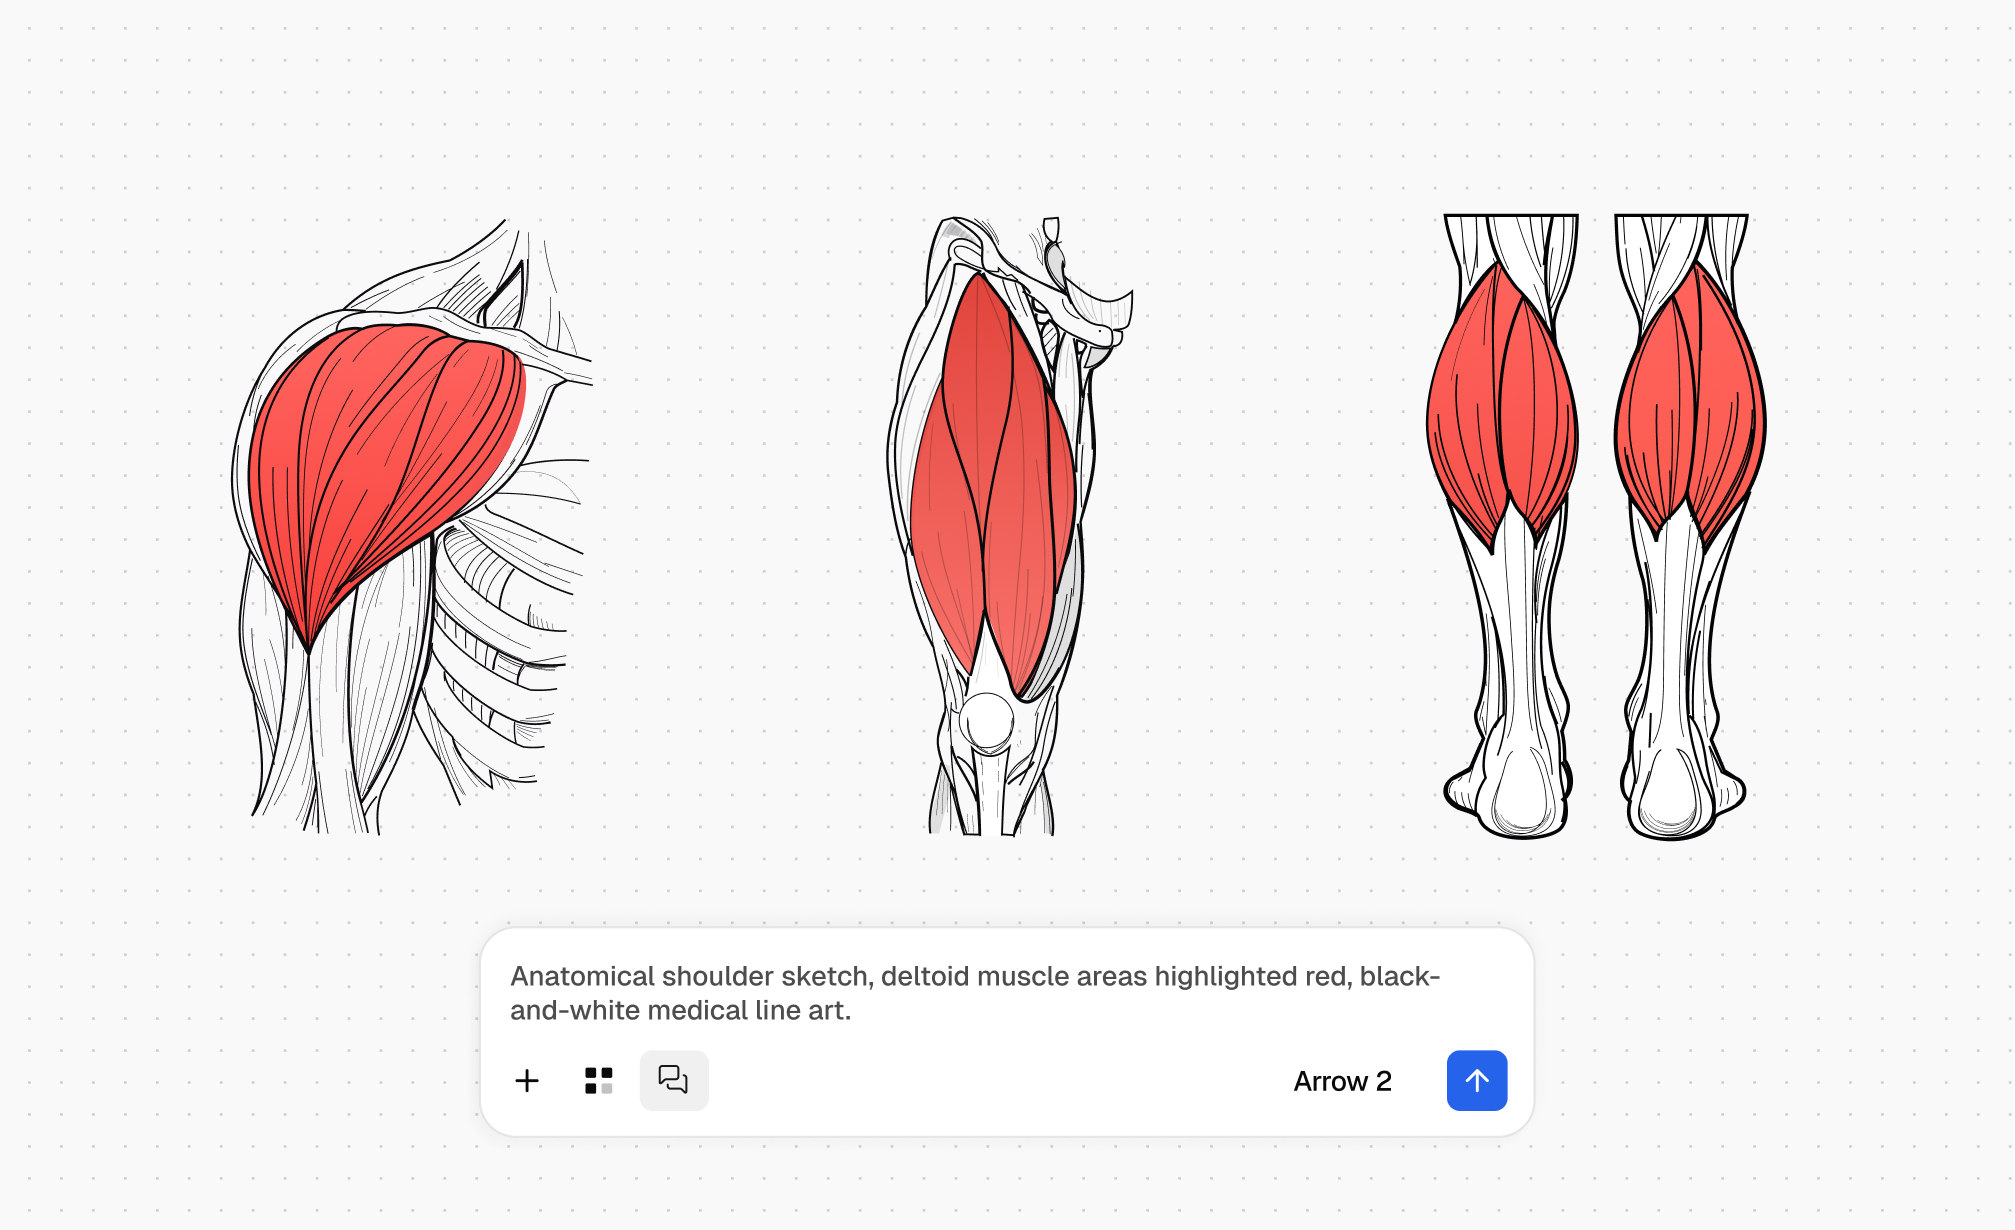
Shoulder, thigh, and calf studies with selected areas highlighted in red. The recorded prompt describes the shoulder panel.
Prompt shown:
Anatomical shoulder sketch, deltoid muscle areas highlighted red, black-and-white medical line art.
Verify anatomical details independently before using the illustration as a technical reference.
Turn a sketch into vector artwork
Use a sketch as the starting point when you want a polished interpretation rather than a faithful trace. State which parts of the concept to preserve and which parts Arrow may simplify or restyle.
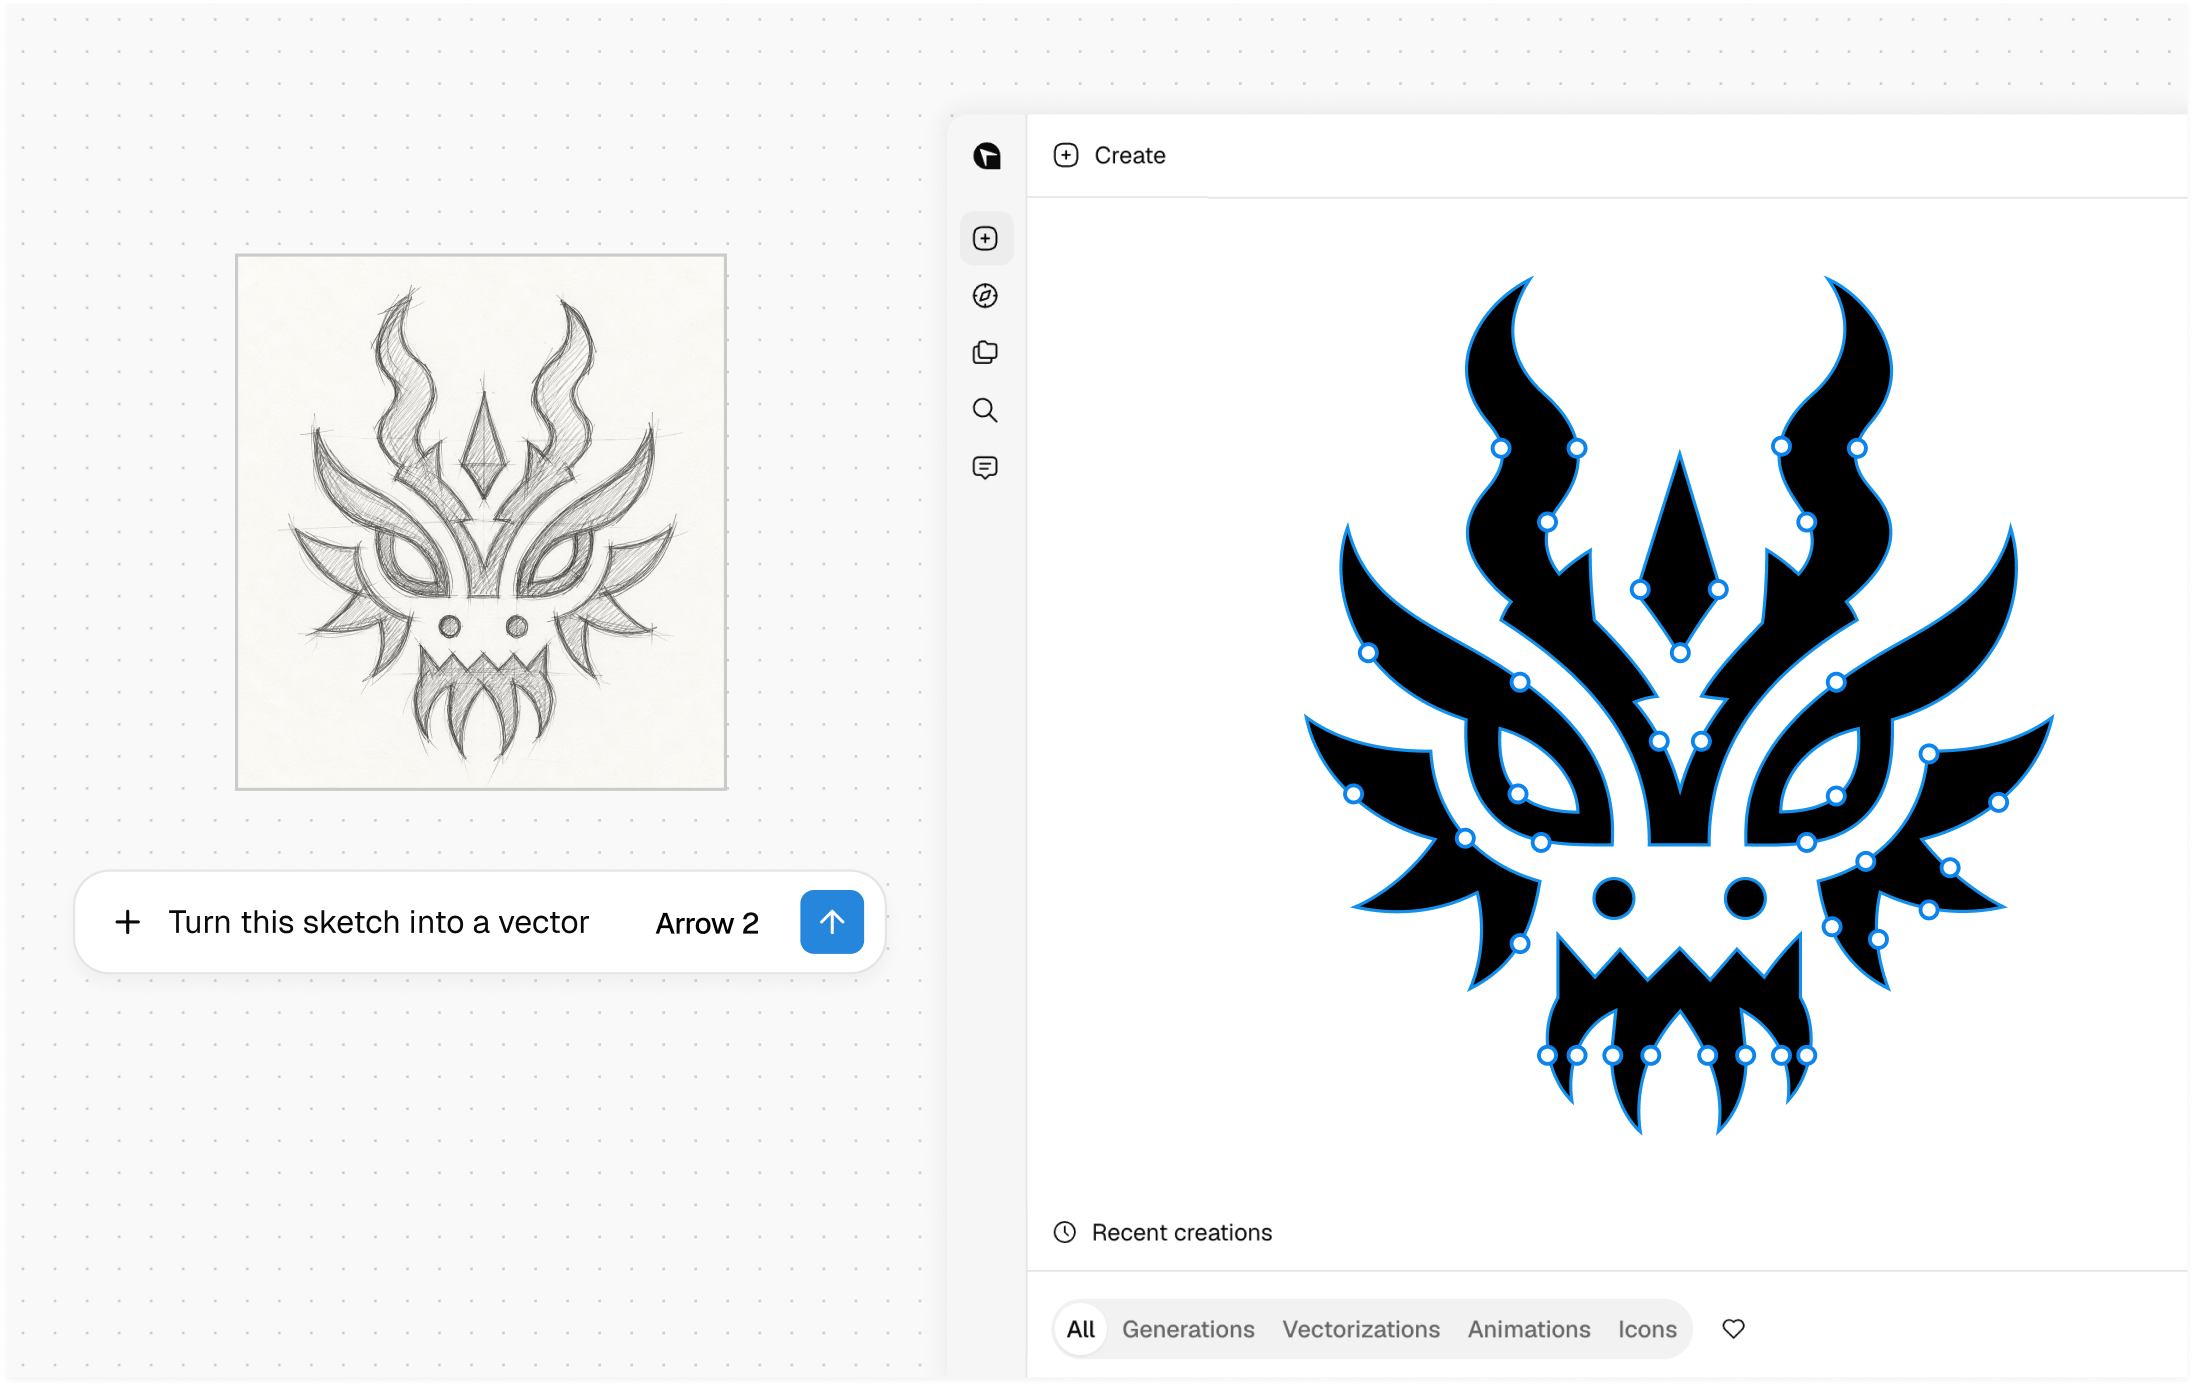
Prompt shown:
Turn this sketch into a vector
For refinement, name one change and the parts to keep:
Simplify the interior marks. Preserve the outer silhouette and eye placement,
and keep the result solid black.
Check that the defining contour and negative space still read at the final size.
Vectorize a raster image
If you already have finished raster artwork, use vectorization to convert its visible shapes. In the App, upload a raster image and prompt “Vectorize this image.”
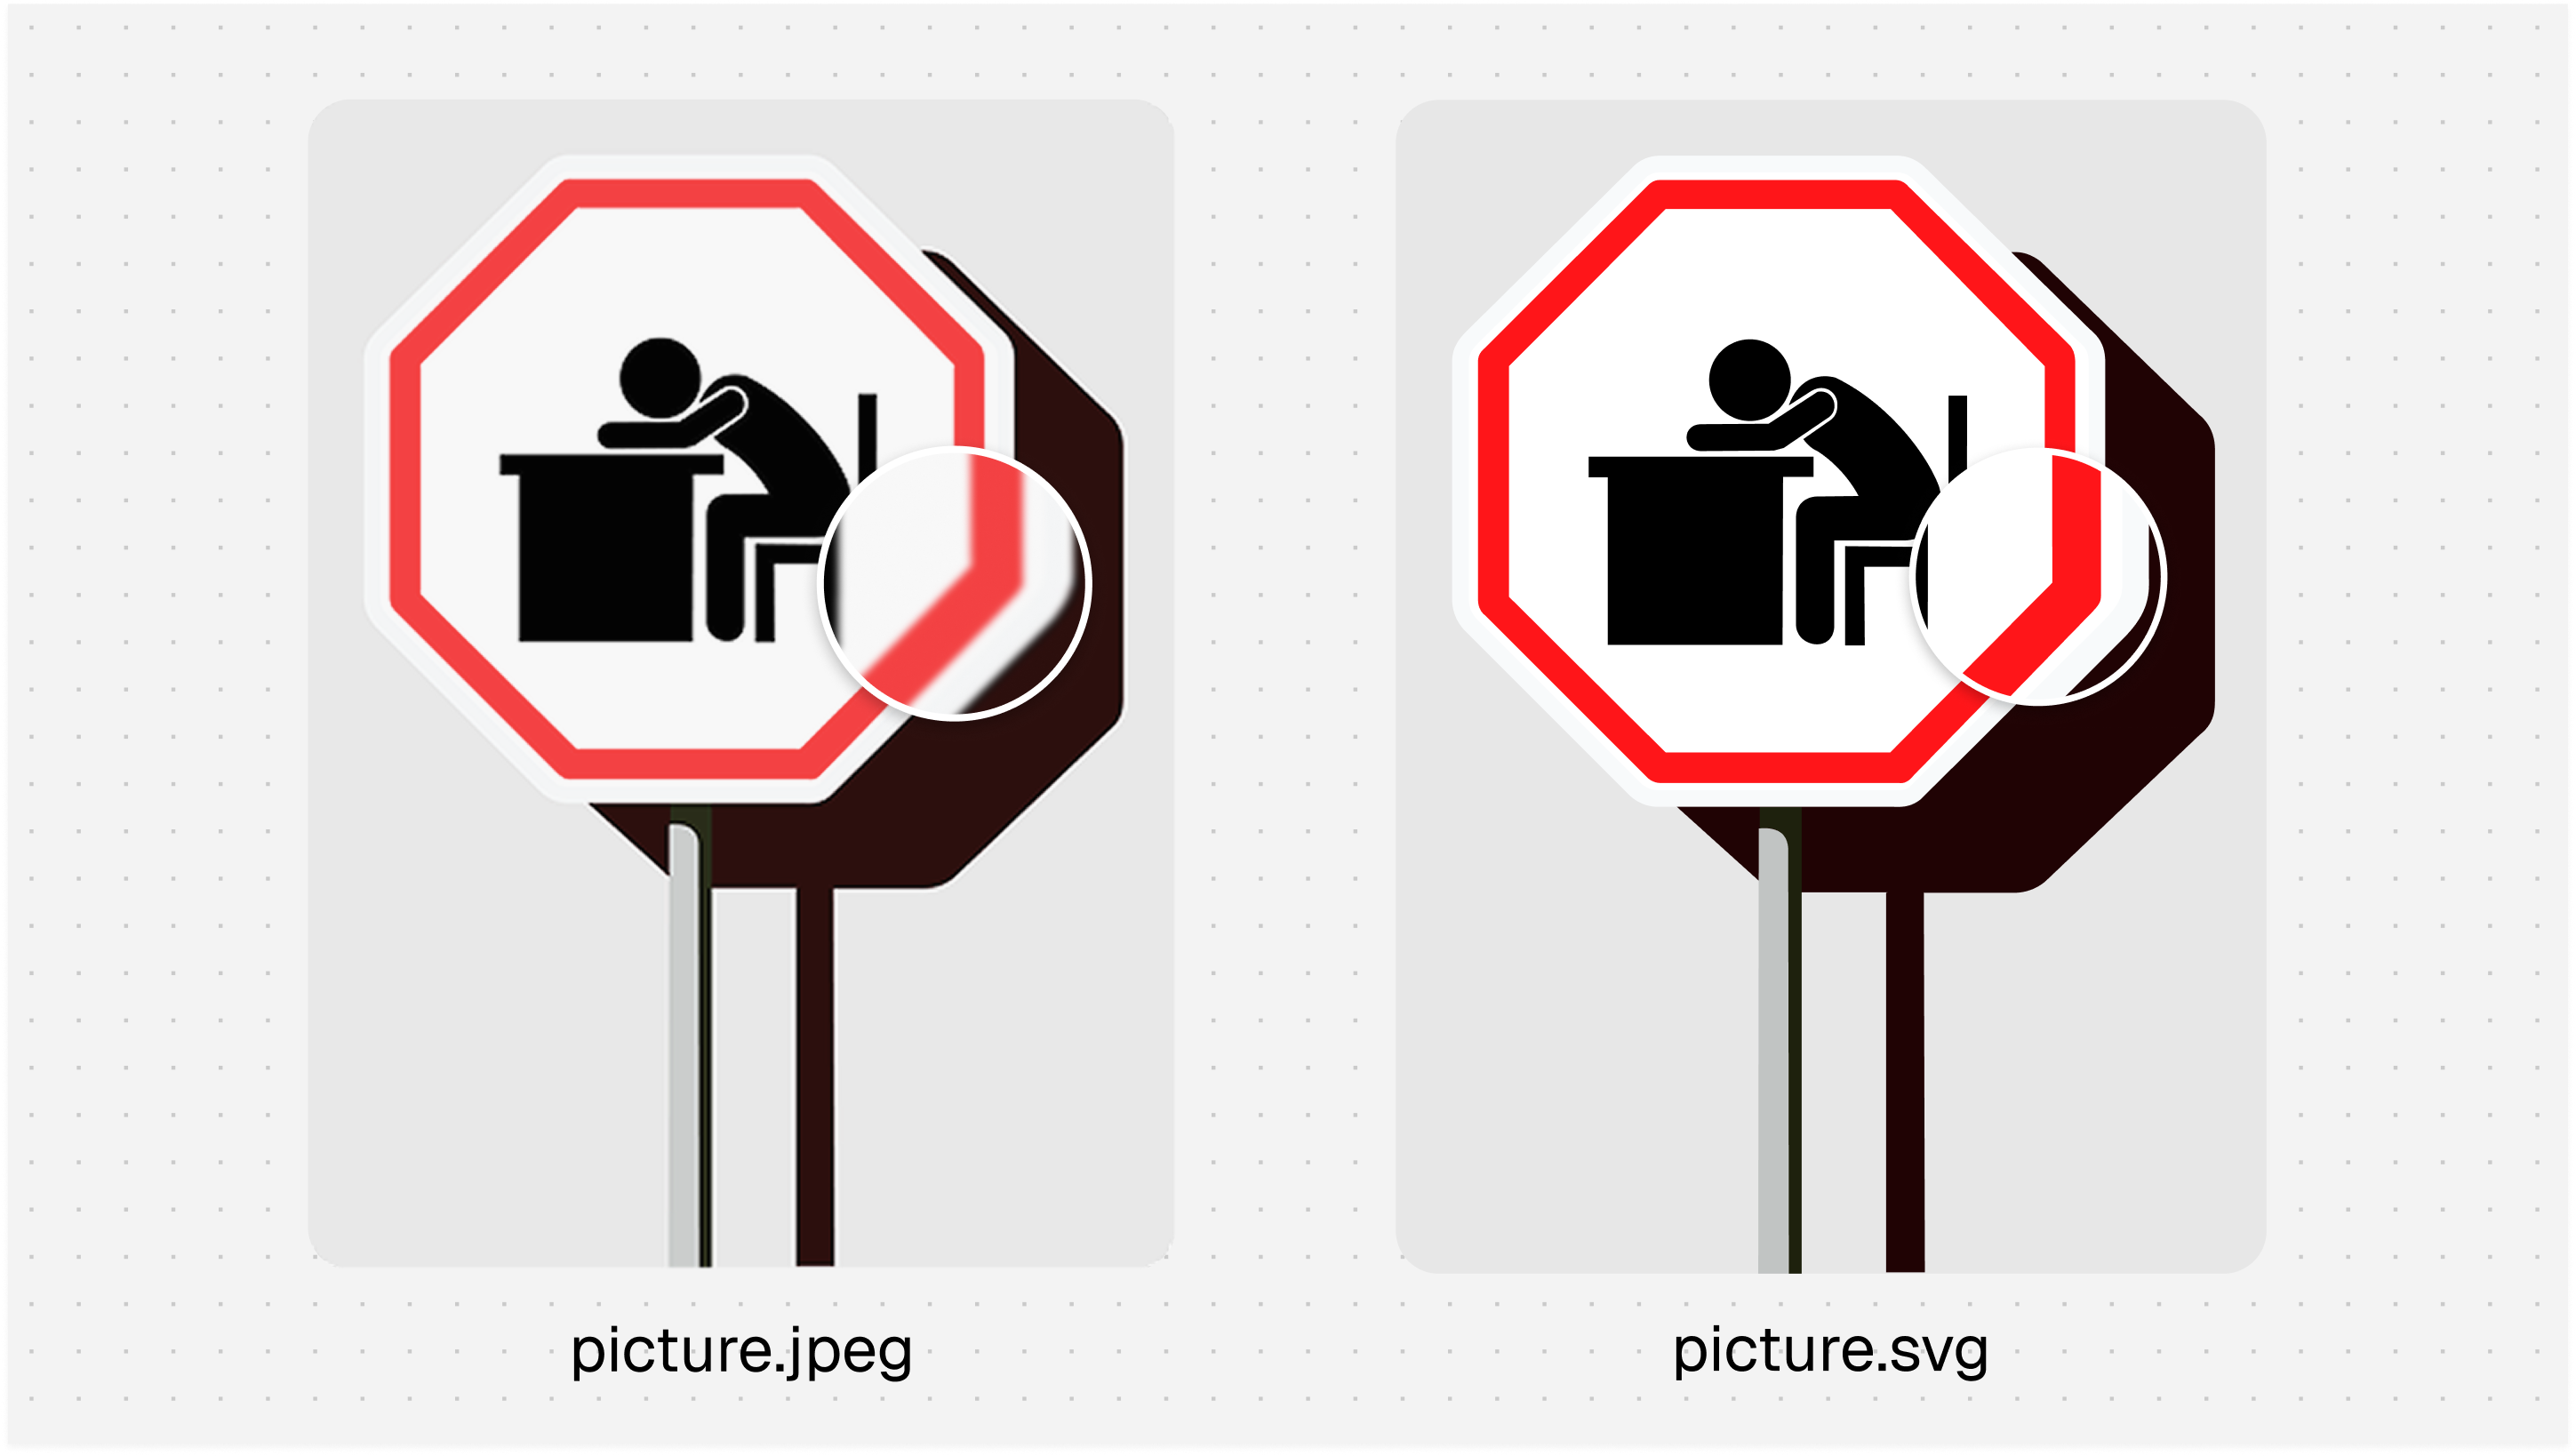
A picture.jpeg and picture.svg comparison. The enlarged details compare raster edges with the
vector result.
The octagonal outline, black pictogram, flat colors, and high contrast separate into distinct shapes. Crop irrelevant borders before submitting. Compare the outline, pictogram, corners, colors, and transparency with the source. Refine the converted result separately when needed:
Set the red areas to #FF1F1F. Keep the pictogram, border width, layout,
and viewBox unchanged.
Add micro animations
Start with an existing SVG and describe the movement:
- Element: Identify the existing shape or group that moves.
- Motion: Describe direction, distance or scale, duration, and easing.
- Playback: Choose a loop or one-time playback, including any pause.
- Preserve: List the shapes, colors, text, and layout that stay unchanged.
Example refinement for the cup:
Animate only the three steam paths. Move each path upward 12px while fading
from fully visible to transparent over 1.4 seconds with ease-out timing.
Stagger their starts by 150ms, pause for 300ms, and loop seamlessly.
Keep the cup, colors, stroke widths, view box, and layout unchanged.
Select the preview to pause or play. Check the final loop for jumps and unintended movement.
Refine and inspect the result
Use each result as the reference for the next focused change:
- Compare it with the prompt and choose the result closest to the intended use.
- Request one change and name the elements that must stay fixed.
- Check the revision at its final size before the next edit or export.
Change only [one element] to [new requirement].
Keep [silhouette, layout, colors, text, and other fixed details] unchanged.
For example: “Change only the cup handle to make it 15% wider. Keep the viewpoint, colors, stroke weight, view box, and all other shapes unchanged.”
| If you see | Try next |
|---|---|
| Too much detail | Name the intended display size and remove secondary texture or decoration. |
| Wrong composition | Specify the viewpoint, crop, placement, and relative scale of the main elements. |
| Inconsistent style | State concrete stroke, fill, palette, and geometry rules; give each reference one role. |
| Incorrect text or labels | Supply the exact text and capitalization, then inspect every label in the output. |
| A weak vectorization | Crop closer, remove background clutter, or start from a cleaner, higher-resolution image. |
| An edit changed too much | Name the single change and list the shapes, colors, text, and layout to preserve. |
Before exporting, inspect the silhouette, text, small geometry, background, transparency, and editability. Open the SVG in its destination tool and confirm it renders at the intended size.
Explore what others are creating
Browse vector artwork and prompts in Explore.